Configuring the reentry effects: Difference between revisions
Spacewarp>Munix |
m 4 revisions imported |
||
(No difference)
| |||
Latest revision as of 18:46, 9 October 2024
Prerequisites:
Setting up Unity
Modeling the mesh in Blender
Configuring the part in Unity
This tutorial will help you setting up reentry effects for your KSP2 modded part by guiding you through creating the reentry meshes and setting up everything needed in Unity.
Introduction

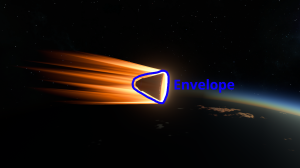
Reentry effects for parts in KSP2 are based on a custom shader which creates some flames coming out of an envelope surrounding the part (see Figure 1).
This envelope is defined for each part using a set of what we'll call reentry meshes. These meshes are set up in order to have a Level of Detail (LOD) system where a high fidelity mesh is used when looking at the part from very close and a less detailed when when looking from afar.
Reentry meshes

As we have learned before, the main part of a part's reentry effects are its reentry meshes, we'll see here a way to create them quite easily in Blender.
We will need 3 reentry mesh for each part, one per level of detail: high, medium a,d low. There is no hard rule on how many face each mesh should have, but as a point of reference, for a quite large M-sized part I would go for meshes with about 5k, 2k and 1k faces respectively.
To create a reentry mesh in Blender, follow these steps:
- Create a copy of your part's mesh and name it anything you want (for example
part_name_lod_0for the high level of detail mesh). - Scale up your new mesh by about 10% (the exact number may vary, we want the reentry mesh to completely envelop the part without any part of the part's mesh sticking out).
- Next we want to turn the copied mesh into a "blob" that will surround the part, we can do so by applying a Remesh modifier to the mesh in Blender in Voxel mode (don't forget to turn on Smooth Shading in the modifier's options).
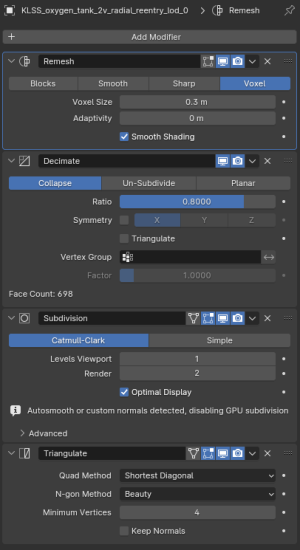
- You can apply a few other modifiers to make the mesh look a bit better, I usually go with Remesh > Decimate > Subdivision > Triangulate (see Figure 2).
- Finally make sure the mesh looks good, it shouldn't be too harsh/pointy and above all else the original part's mesh should not poke through the reentry mesh.
- When finished, you can export your created mesh as a FBX file and repeat the preceding steps for all 3 reentry meshes (high, medium and low details).
Setting up the reentry effects in Unity
For this section, we assume you have already set up your part in Unity, meaning you have a prefab for your part which has a child named model containing your part's mesh.
First of all, we need to set up a new Material for the reentry effect shader, this Material can be shared between all your parts. To do so you need to:
- Create a new Material asset called
Reentry, this can be in theAssets/Partsfolder of your Unity project. - Set this Material to the
KSP2/Parts/Reentryshader (provided in KSP2 Unity Tools). - Assign the texture called
Heatfrom KSP2UT to the Texture field of the Material.

Then, we will setup the reentry effects for the part:
- Drag your 3 reentry meshes FBX files as assets into Unity (into your part's folder if you created one for example).
- Create an Empty child to the
modelobject in your part's prefab hierarchy, name itlod_reentry. - Drag the 3 reentry meshes as children of the
lod_reentryobject. - Unpack each mesh' prefab under Prefab in the contextual menu.
- Apply the
Reentrymaterial to each reentry mesh. - Add a new
LOD Groupcomponent to thelod_reentryobject. - Set
LOD 0to a Transition of50%and set its Renderer to your high level of detail reentry mesh' Mesh Renderer. - Set
LOD 1to a Transition of25%and set its Renderer to your medium level of detail reentry mesh' Mesh Renderer. - Set
LOD 2to a Transition of0%and set its Renderer to your low level of detail reentry mesh' Mesh Renderer. - Click on Recalculate Bounds in the LOD Group above the list of LODs.
- Make sure the
lod_reentryobject is enabled (the checkbox needs to be checked at the top of Inspector next to its name) before the next step. - Add a new
Reentry Meshcomponent to thelod_reentryobject. - Apply all Overrides in your part's root prefab.
- Disable the visibility of the
lod_reentryobject by unchecking the checkbox at the top of Inspector next to its name. - Re-apply all Overrides in your part's root prefab.
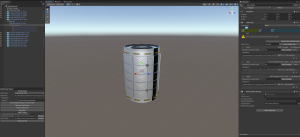
If you followed all instructions correctly, your part's reentry effects should be set up now like what you can see in Figure 3. You can new rebuild your Addressables bundle and test the effects in game.